
You can bake exceptional sourdough bread without a Dutch oven by using two identical loaf pans stacked together, creating the same sealed steam environment that produces a crisp, golden crust and tender crumb. This technique delivers professional results by trapping moisture during the first phase of baking, mimicking the coveted performance of expensive enameled cast iron while offering greater accessibility for home bakers who prefer not to invest in specialized equipment or manage the weight and heat retention challenges of a traditional Dutch oven.
After experimenting with this approach in my own kitchen, I discovered that the dual-pan system offers advantages beyond mere substitution. The rectangular shape produces consistent slices ideal for morning toast or elegant sandwich presentations at dinner parties, while the parchment liner ensures effortless release without the seasoning maintenance cast iron demands. The method works particularly well with cold-proofed dough transferred directly from a banneton, preserving the structural integrity developed during fermentation while the high initial temperature delivers the thermal shock required for dramatic rise.
The accessibility of this technique has democratized artisan bread baking for home cooks who previously felt excluded by equipment requirements. Most kitchens already contain suitable loaf pans, and the modest investment in a matching pair eliminates the substantial cost barrier while reducing the risk of burns from maneuvering heavy, scorching-hot Dutch ovens. This approach respects the centuries-old craft of sourdough fermentation while embracing practical innovation.
What You’ll Need: Equipment and Ingredients
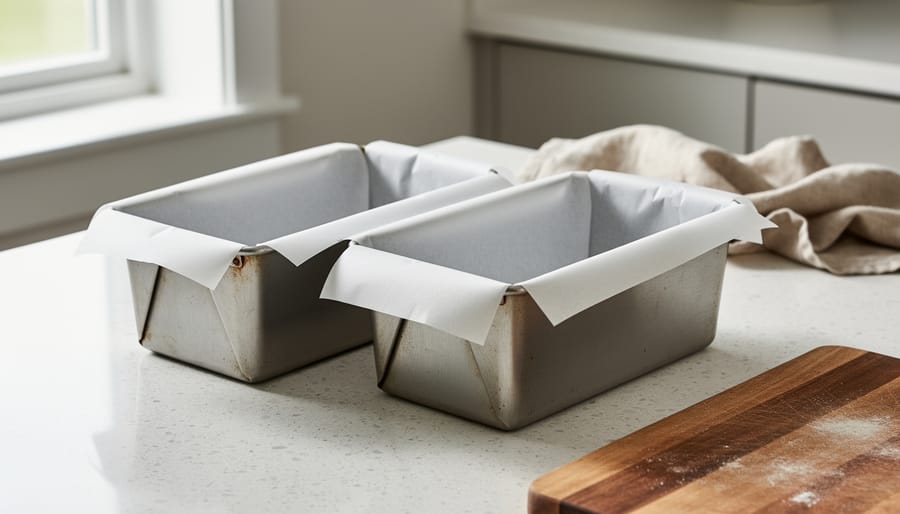
The beauty of this technique lies in its simplicity, you need remarkably few specialized tools to produce a loaf that rivals the finest bakery offerings. Think of this as curated minimalism for the home baker, where each item serves a precise function in the transformation of flour and water into crusty, tangy perfection.
Your equipment list is refreshingly straightforward:
- Two identical loaf pans (typically available in convenient 2-packs, ensuring perfect alignment)
- Parchment paper for a clean release and easy handling
- A banneton basket for cold proofing, which develops superior flavor and structure
- Active sourdough starter, fed and bubbly with life
- Bread flour, preferably high-protein for optimal gluten development
- Filtered water at room temperature
- Fine sea salt to balance and enhance fermentation
The loaf pans are your primary investment, and quality matters here. Look for heavy-gauge aluminized steel or stainless steel construction that can withstand the intense 500-degree preheat without warping. The identical sizing is crucial, these pans will stack together to create a sealed steam chamber, so any mismatch in dimensions compromises the method entirely. Many home bakers discover these pans come in 2-packs, a fortunate convenience that makes this technique immediately accessible.
The banneton basket deserves special mention. While you could technically proof in a bowl lined with a heavily floured towel, a proper banneton provides superior moisture management during the cold proof phase. It wicks excess hydration from the dough surface while maintaining the structured tension you’ve worked to develop. This is where craft meets practicality, a modest investment that transforms your results.
For ingredients, resist the temptation to overcomplicate. Your starter should be at peak activity, doubling predictably after feeding. The flour carries the structure, the water creates extensibility, the salt controls fermentation and builds flavor complexity. That’s the entire cast of this culinary performance, elevated through technique rather than novelty additions.
Before You Begin: Essential Precautions
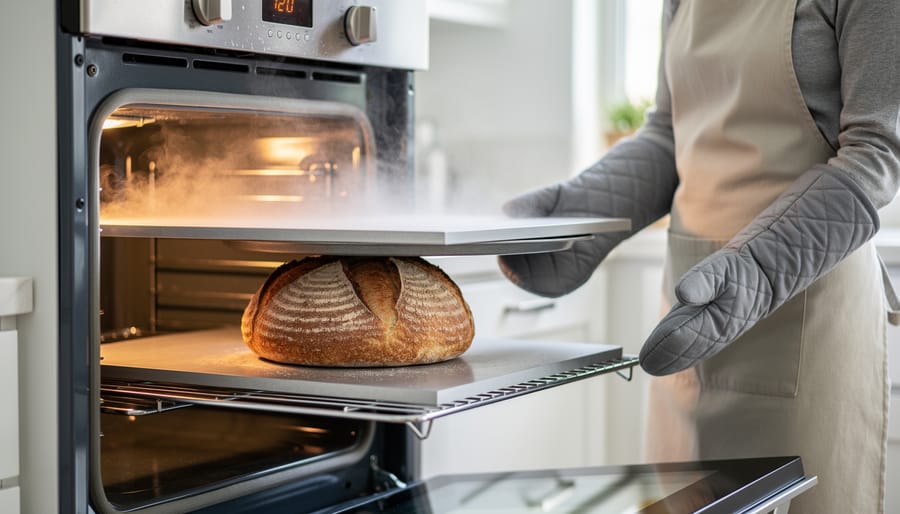
Baking sourdough at temperatures that rival a professional hearth requires attention to detail and a healthy respect for your equipment. Before you embark on this method, confirm that both loaf pans are oven-safe to at least 500°F. Many standard baking pans cannot withstand such heat and will warp, discolor, or even release harmful fumes. Check manufacturer specifications, not assumptions.
Heavy-duty oven mitts are non-negotiable. The thin cotton variety will not suffice when you’re maneuvering metal pans that have been radiating heat for thirty minutes. I recommend silicone-lined mitts with extended cuffs that protect your forearms. When you remove the top pan to expose the loaf for its final browning phase, expect a rush of steam. Tilt the pan away from your face and hands as you lift it, allowing the moisture to escape in a controlled direction rather than billowing toward you.
Dough hydration management matters more with this method than in a Dutch oven. A properly hydrated sourdough, typically 70-75% water content, should hold its shape but remain supple. If your dough is excessively wet and spreads like batter when turned out, it will stick despite parchment paper and create a frustrating cleanup. Conversely, overly stiff dough will not develop the open crumb structure you want. The parchment paper lining provides insurance against sticking, but it works best when the dough itself has been properly developed and shaped. Take your time with this preparation, and the rest of the process will reward your patience.
The Step-by-Step Baking Process
Cold Proofing Your Dough
The cold proof transforms sourdough from merely good to exceptional. After your final shaping, nestle the dough seam-side up in a well-floured banneton and transfer it to the refrigerator. This slow fermentation, typically 8 to 16 hours, develops the complex tangy notes and nutty undertones that define artisan sourdough. The extended timeline also offers welcome flexibility for the home baker. Shape your loaf after dinner, then bake fresh bread for tomorrow’s brunch without setting an alarm for midnight.
I personally prefer this method, not just for scheduling convenience but for the depth it brings to the final loaf. The cold environment slows yeast activity while allowing enzymatic action to continue, creating layers of flavor impossible to achieve in a quick room-temperature proof. You’ll notice the difference immediately when you slice into the finished bread: a more pronounced tang, a creamier crumb structure, enhanced keeping quality.
The dough firms slightly in the cold, making it easier to handle during transfer and scoring. This is particularly valuable when working without a Dutch oven, as confident handling ensures clean oven spring and professional presentation.
Preheating the Oven
Set your oven to 500°F and let it preheat fully, this step is non-negotiable. Unlike traditional Dutch oven methods where the vessel preheats alongside the oven, your loaf pans remain outside during this phase. The reasoning is deliberate: you’re creating an environment of intense, sustained heat that will shock the dough into its initial rise the moment it enters the oven. This thermal burst drives what bakers call oven spring, that dramatic expansion in the first minutes of baking that creates an airy, open crumb structure.
Allow at least 30 minutes for your oven to reach temperature. Commercial ovens maintain heat more consistently, but home ovens fluctuate, and you want every surface radiating steady warmth. An oven thermometer offers precision if you question your dial’s accuracy. The fully preheated oven becomes your foundation for professional-quality crust and texture, transforming humble loaf pans into an artisan baker’s tool.
Preparing Your Loaf Pan
The parchment paper creates a crucial barrier between your dough and the pan’s surface, ensuring a clean release once your loaf emerges golden and crusty. Cut a piece generous enough to line the bottom and extend up the long sides with a slight overhang, this forms handles you’ll appreciate when lifting out the finished bread. Press the parchment flat against the pan’s interior, smoothing any creases or wrinkles that might imprint on your loaf’s surface. The corners will naturally fold and bunch somewhat, but focus on keeping the base and long walls taut and even. This attention to detail prevents those frustrating spots where dough seeps under poorly placed paper and fuses to the metal, compromising your loaf’s appearance and requiring aggressive scraping later.
Shaping and Scoring
Remove the banneton from your refrigerator and work with confidence, cold dough handles beautifully, maintaining its structure as you transfer it. Gently invert the banneton over your parchment-lined loaf pan, allowing the dough to release in one smooth motion onto the center of the paper. The surface that was against the banneton now faces up, displaying the flour-dusted spiral pattern from your proofing basket, a mark of proper technique.
The dough should feel firm yet yielding to the touch, holding its dome shape without spreading aggressively across the pan. This taut surface tension indicates successful fermentation and shaping from your earlier work. Position the loaf so it sits centered in the pan, giving it room to expand evenly during the bake.
Now execute the expansion score: using a sharp lame or razor blade held at a shallow angle, nearly parallel to the dough surface, make one decisive cut along the length of the loaf, approximately half an inch deep. This isn’t merely decorative; the score creates a controlled weak point where steam can escape and the loaf can expand upward rather than bursting randomly. The blade should glide through the outer skin with minimal drag, revealing the slightly glossy, cream-colored interior. A proper score will begin to open subtly even before the oven, the edges pulling apart like a seam ready to bloom.
Work quickly but deliberately, prolonged handling warms the dough and risks deflation.
Creating the Steam Chamber
With your scored dough now resting in the parchment-lined pan, retrieve the second loaf pan, your crucial partner in this technique. Invert it and place it directly on top of the first, creating what amounts to a sealed baking chamber. This is the moment that transforms ordinary cookware into artisan bread equipment.
Alignment matters profoundly here. Run your fingertips along the rim where the two pans meet, checking for gaps or misalignment. Even a small opening compromises the steam environment you’re working to create. The pans should nest together snugly, their edges flush on all sides. This sealed configuration traps the moisture releasing from your dough as it bakes, surrounding the loaf with the humid atmosphere essential for dramatic oven spring and that coveted artisan crust.
Think of this setup as your stovetop-to-oven Dutch oven equivalent, a contained microclimate where steam cannot escape during those critical first twenty minutes. The moisture keeps the surface pliable, allowing maximum expansion before the crust sets. Without this enclosure, your crust would firm too quickly, restricting rise and yielding a dense, compressed interior rather than the airy, open crumb you’ve spent days cultivating through fermentation. The elegance lies in the simplicity: two inexpensive pans delivering professional results.
The Bake: Temperature and Timing
The moment your stacked pans enter the oven marks the beginning of a carefully orchestrated transformation. As you open the oven door, drop the temperature to 450°F, then slide the sealed loaf pans onto the center rack. This immediate temperature reduction creates the ideal environment for controlled oven spring without scorching the crust before the interior has time to develop.
- Bake covered for 20 minutes at 450°F. During this phase, the trapped steam works its magic, softening the dough’s surface so it can expand freely. You’ll notice your kitchen filling with the first whisper of baking bread, a subtle wheaten aroma that builds anticipation.
- Remove the top pan carefully using oven mitts. Lift straight up to avoid disturbing the risen loaf. The dough will have expanded significantly, with your expansion score creating dramatic splits across the surface. Steam will escape as you uncover the pan, so keep your face back from the rising heat.
- Continue baking uncovered for 25 to 30 minutes. Watch as the crust deepens from pale gold to rich mahogany. The aroma intensifies, becoming nutty and caramelized. When you tap the crust with your knuckle, it should sound hollow and feel firm, not soft or yielding.
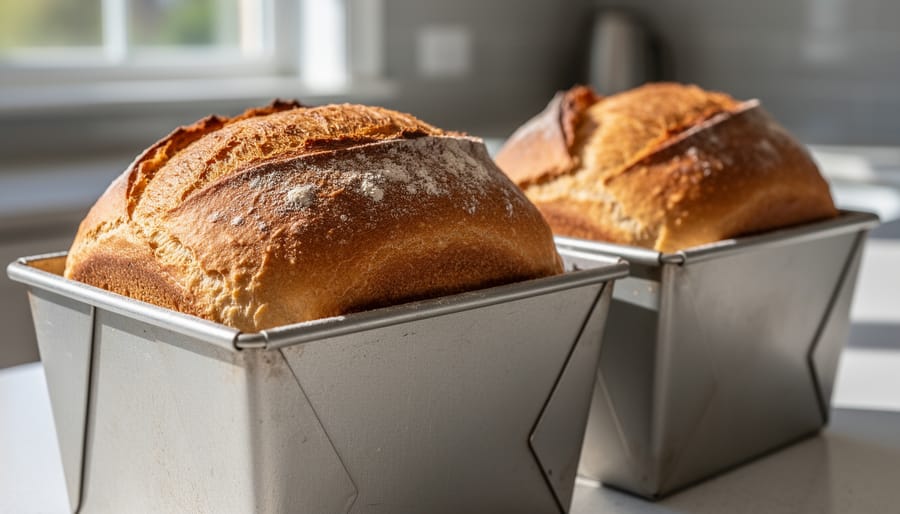
The final minutes are where patience proves essential. Resist opening the oven door repeatedly, as each peek releases heat and disrupts the crust’s development. Instead, trust your senses. When the bread reaches a deep amber color bordering on bronze, with darker caramelization along the scored edges, it’s ready. The sound when you tap it should be crisp and resonant, like knocking on hardwood rather than muffled thuds against dough.
How to Know Your Sourdough Is Perfect
The moment you’ve been waiting for arrives when you lift that top pan: a deeply caramelized, mahogany-brown crust, darker than you might expect from a commercial loaf, should greet you. This is what proper oven heat and trapped steam accomplish together. But visual appeal alone doesn’t confirm perfection. Tap the bottom of the loaf, a hollow, resonant sound indicates a fully baked interior with developed structure. If it thuds rather than rings, it likely needs another five minutes.
For precision, use an instant-read thermometer inserted into the center of the loaf. You’re looking for an internal temperature between 205 and 210°F. Below this range, the crumb remains gummy; above it, you risk dryness. The crust should feel firm to the touch, almost crisp, with a slight give when pressed gently.
Once cooled, store your loaf cut-side down on a cutting board, covered loosely with a clean kitchen towel for the first day. For longer storage, wrap in linen or place in a paper bag, never plastic, which softens that hard-earned crust. The bread will stay fresh for three to four days at room temperature, developing a slightly chewier texture as it ages.
Now comes the truly rewarding part: serving. A thick slice of this sourdough belongs on a cheese board alongside aged manchego, creamy brie, or tangy aged cheddar. Pair with thinly sliced prosciutto or soppressata, cornichons, and fig jam. Consider it the foundation of an elevated bread course with a crisp Chablis or a light-bodied Pinot Noir. The tang of properly fermented sourdough cuts through rich cheeses and fatty charcuterie, while its complex flavor profile stands up to wine without competing. This is bread as culinary centerpiece, not mere accompaniment.
Frequently Asked Questions
The two-loaf-pan method for sourdough raises questions from bakers accustomed to traditional techniques. Here are answers to the most common concerns.
Can I use different-sized loaf pans for this method?
The pans must be identical in size to create a proper seal that traps steam. Mismatched pans leave gaps that allow moisture to escape, compromising crust development and oven spring. The video demonstrates using pans from a standard 2-pack, which ensures perfect alignment.
What if I don’t have a banneton for proofing?
Line a mixing bowl with a well-floured kitchen towel as an effective substitute. The fabric prevents sticking while allowing the dough to breathe, though a proper banneton provides better structure and those attractive spiral patterns on the finished loaf.
How do results compare to Dutch oven baking?
When executed properly, this technique produces remarkably similar results. The sealed loaf pans create the same steam environment that makes Dutch ovens so effective, yielding comparable crust color, texture, and interior crumb structure.
Can I bake multiple loaves simultaneously using this method?
Yes, provided your oven accommodates multiple stacked pan sets without crowding. Ensure adequate space between each set for proper heat circulation, and rotate positions midway through the uncovered phase for even browning.
Troubleshooting common issues requires understanding the science behind artisan bread making. A pale crust typically indicates insufficient heat or premature uncovering. Verify your oven reaches the full 500°F preheat, then maintains 450°F throughout the bake. Dense crumb often stems from underproofing or insufficient steam, though yeast fermentation issues and gluten development problems play roles as well.
If your loaf spreads sideways rather than rising vertically, the dough likely has too much hydration for this pan method. Reduce water by 5-10% in your next batch. Conversely, a crust that forms too quickly before proper oven spring occurs suggests steam isn’t being retained. Check that your pans align perfectly with no gaps, and consider placing a small piece of aluminum foil over any visible seams.
Water quality affects dough behavior more than many home bakers realize. Toronto’s municipal supply works beautifully for sourdough, though heavily chlorinated water in some regions can slow fermentation. If your dough consistently underperforms despite proper technique, try filtered water.
The expansion score deserves special attention. Cut too shallow and the loaf tears unpredictably. Too deep and you deflate the dough. A confident stroke about half an inch deep, executed with a sharp blade at a slight angle, gives the loaf room to bloom while maintaining its shape. This single cut transforms a simple scored line into an elegant ear that catches the light on a finished loaf worthy of any refined table.
Mastering sourdough without a Dutch oven is more than a workaround, it’s an invitation to bring artisan bread into your everyday culinary practice. This two-loaf-pan technique democratizes the craft, making it accessible whether you’re outfitting your first kitchen or simply prefer a lighter, more versatile approach. The result is genuine: a dark, crackling crust and an open, airy crumb that holds its own against any bakery loaf.
Toronto’s food culture thrives on this spirit of experimentation and excellence. The city’s passion for craft, from small-batch breweries to innovative restaurants, extends naturally into the home kitchen. Your sourdough becomes the foundation for memorable meals: tear into a warm slice alongside a thoughtful goat cheese pairing build a charcuterie board that showcases local producers, or explore the broader world of food & drink pairings where your bread becomes the unifying element.
Don’t hesitate to refine the method as you bake. Adjust hydration, experiment with scoring patterns, develop a signature style that reflects your palate. Each loaf teaches you something new. The beauty of this approach is its flexibility, you control the process, the timing, the final presentation. Make it your own, and enjoy the satisfaction of serving something truly handmade.