
Refinishing a wine bar cabinet transforms a tired or dated piece into a showpiece worthy of your collection, typically requiring three to five days of work spread across preparation, application, and curing time. Unlike standard cabinetry, wine storage furniture demands attention to temperature stability, humidity resistance, and vibration dampening properties that protect your investment in fine bottles. The process centers on careful surface preparation, selecting the right finish for both aesthetic appeal and functional durability, and methodical application that preserves the cabinet’s structural integrity while updating its appearance.
I’ve refinished several wine cabinets in my own collection over the past decade, and the difference between a rushed job and one executed with patience is immediately visible in both the final sheen and how well the piece ages. The specialized nature of wine storage means you’re not simply refreshing a decorative element but restoring a functional preservation system. Temperature fluctuations from improper finishes can compromise wine quality, while chemical off-gassing from the wrong products can taint cork and ultimately affect taste profiles.
The investment in proper refinishing extends beyond aesthetics. A well-executed restoration increases the cabinet’s resale value and integrates seamlessly with contemporary wine decor strategy, whether you’re staging a home for sale or creating a personal tasting sanctuary. Professional services like Cabinet spray painting in Toronto offer factory-grade finishes, though the hands-on approach delivers both satisfaction and customization unavailable through commercial channels. This guide walks you through the complete refinishing process, from initial assessment and material selection through final protective coating, ensuring your cabinet serves both form and function for years to come.
Why Wine Bar Cabinets Deserve Special Refinishing Attention
Wine bar cabinets occupy a unique position in the home, serving dual roles that standard cabinetry rarely achieves. They’re both functional wine storage and sophisticated display pieces in your most visible entertaining spaces. When guests gather in your dining room or living area, the wine cabinet becomes a focal point, its finish, glass clarity, and overall presentation speak to your aesthetic sensibilities and your respect for the collection it houses.
This dual nature demands a refinishing approach that differs substantially from typical furniture restoration. Standard cabinets prioritize durability and appearance, certainly, but wine bar cabinets must actively protect their contents while maintaining showpiece quality. The wood finish becomes a barrier against environmental factors that threaten wine: temperature swings, humidity fluctuations, and the inevitable condensation that forms on chilled bottles. A compromised or worn finish doesn’t just look tired, it can absorb moisture, harbor odors, or even transfer unwanted flavors to cork-sealed bottles stored in direct contact with wooden racks.
The glass components common to wine cabinets add another layer of complexity. These display panels showcase your collection but require careful handling during refinishing to avoid etching from chemical strippers or damage during disassembly. Many wine cabinets also feature specialized elements, temperature control vents, humidity-regulating compartments, or integrated lighting, that need protection during the refinishing process.
Beyond the technical considerations, there’s an emotional dimension. Wine enthusiasts invest significantly in both their collections and the furniture that houses them. A well-refinished wine cabinet doesn’t simply store bottles; it honors the ritual of selection, the anticipation of opening, and the pleasure of sharing exceptional wines with people who appreciate them.
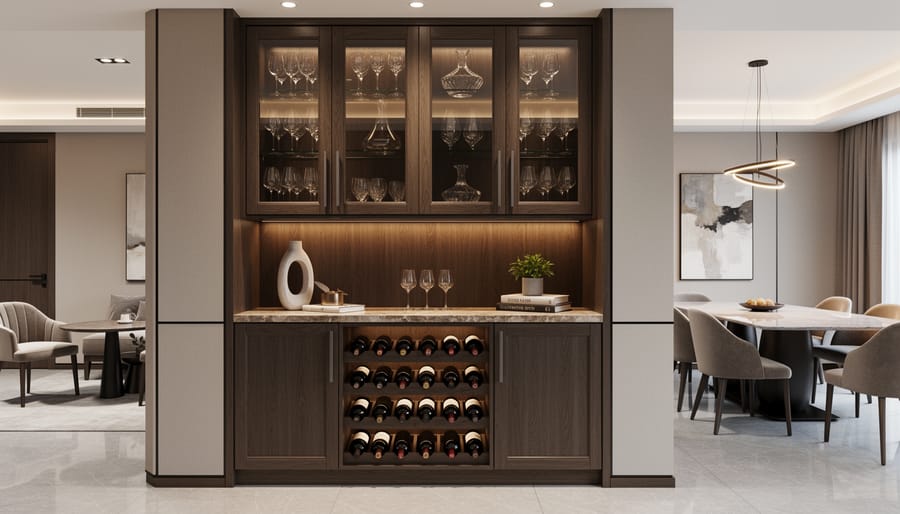
Assessing Your Wine Bar Cabinet Before You Begin
Before you invest time and materials in refinishing your wine bar cabinet, a thorough assessment determines whether your piece is a good candidate for a DIY restoration or requires professional intervention. This evaluation also shapes your refinishing strategy, influencing everything from product selection to technique.
Start by examining the wood itself under good lighting. Run your hand across the surface to feel for raised grain, deep gouges, or water damage that might require extensive sanding. Solid wood cabinets tolerate aggressive refinishing far better than veneer, which may only withstand one or two careful refinishing cycles before you risk sanding through to the substrate. Check corners and edges where veneer commonly lifts or chips, these areas reveal the cabinet’s construction quality and refinishing potential.
Test the cabinet’s structural soundness by gently applying pressure to joints where the frame connects. Wobbly corners or separated joints need repair before refinishing begins, as a beautiful finish can’t compensate for unstable construction. Open and close doors repeatedly, noting any binding, sagging, or misalignment that suggests worn hinges or warped panels.
Your assessment should cover these critical points:
- Wood type: solid hardwood versus veneer construction
- Joint integrity: dovetail, mortise-and-tenon, or dowel connections remain tight
- Finish condition: surface scratches versus deep penetrating damage
- Hardware functionality: hinges, drawer slides, and pulls operate smoothly
- Glass elements: cracks, chips, or cloudiness in doors and shelving
- Water damage: staining, warping, or soft spots from bottle condensation
Examine the glass components carefully. Replacing custom-cut glass for vintage cabinets can be costly, so factor this into your refinishing decision. Similarly, scrutinize specialized wine storage features like built-in racks or bottle cradles, damaged elements may require custom fabrication.
If you discover severe structural issues, extensive veneer damage across large surfaces, or intricate inlay work that’s deteriorating, professional restoration becomes the wiser investment. These specialized repairs demand expertise that protects your cabinet’s value and functionality for decades of wine service ahead.
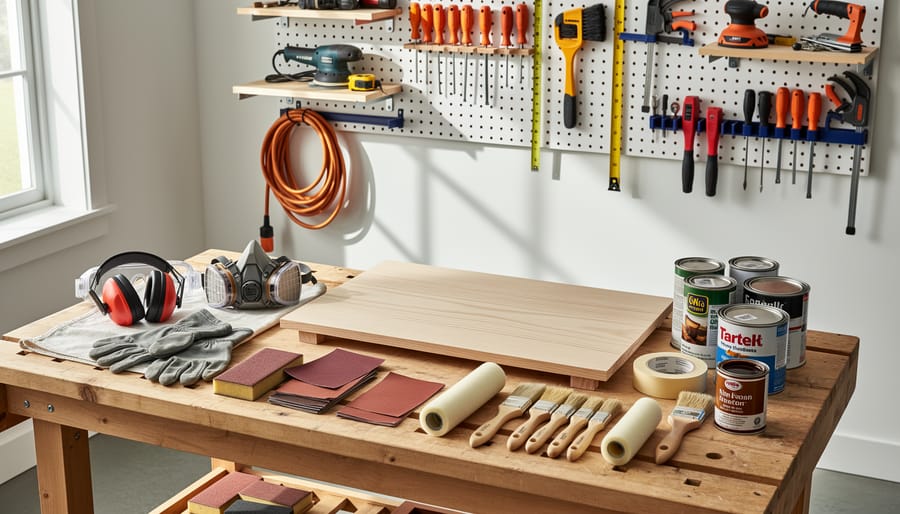
Essential Tools and Materials for Wine Cabinet Refinishing
Choosing the Right Finish for Wine Storage
The finish you select for your wine bar cabinet must perform a dual role that standard furniture finishes rarely face: protecting the wood from moisture while showcasing the grain and color that make these pieces centerpieces of entertaining spaces.
Polyurethane remains the most reliable choice for wine storage applications. Water-based polyurethane offers exceptional moisture resistance without the amber tint that oil-based versions develop over time, making it ideal for lighter woods or painted finishes. Oil-based polyurethane provides deeper protection and a richer appearance that enhances walnut, mahogany, and cherry, though it requires longer curing times and more ventilation during application. Both formulations create a barrier against condensation from chilled bottles and the inevitable wine drips that occur during entertaining.
Lacquer delivers a harder, more scratch-resistant surface than polyurethane, with the crystalline clarity that serious collectors appreciate for display cabinets. However, lacquer demands expert application technique and offers less moisture resistance, making it better suited for cabinets in climate-controlled environments rather than those near humid bar areas.
For ultimate protection in high-use entertaining spaces, conversion varnish provides commercial-grade durability. This catalyzed finish cures through chemical reaction rather than evaporation, creating a surface that withstands repeated wine exposure and frequent cleaning. Professional refinishers favor conversion varnish for clients who regularly host gatherings where their wine bar cabinet sees intensive use.
The sheen level matters as much as the finish type. Satin sheens between 40-60 gloss units balance elegant appearance with practical stain concealment, while high-gloss finishes showcase wood figure but reveal every fingerprint and water spot.
Safety Precautions and Workspace Preparation
Before stripping a single layer of finish, establish a workspace that prioritizes your health and the quality of your results. Chemical strippers and finishing products release volatile organic compounds that can cause respiratory distress, headaches, and long-term health effects when proper precautions aren’t observed. Refinishing a wine bar cabinet, a piece you’ll eventually use to showcase your eco-friendly wine collection, demands the same care you’d give to selecting those bottles.
Set up your workspace in a garage with both doors open or outdoors under a covered area that shields the cabinet from direct sunlight and precipitation. Position a box fan to pull fumes away from your working position, creating airflow that carries vapors outside rather than circulating them. If working indoors is unavoidable, open windows on opposite sides of the room and run fans to establish a cross-breeze.
Invest in a properly rated respirator with organic vapor cartridges, not a simple dust mask. Chemical-resistant nitrile gloves prevent skin absorption of stripping agents, and safety glasses with side shields protect against splashes during the stripping process. Wear old long-sleeved clothing you can discard afterward, as some finishing products permanently stain fabric.
Cover your work surface with heavy-duty plastic sheeting or rosin paper, extending well beyond the cabinet’s footprint to catch drips and spills. Keep a metal container with a tight-fitting lid nearby for soaking used stripper-laden rags and steel wool, as these materials can spontaneously combust if left in crumpled piles. Store all chemical products away from heat sources and out of reach of children and pets, ensuring lids are sealed tightly after each use.
Step-by-Step Wine Bar Cabinet Refinishing Process
Step 1: Disassembly and Hardware Removal
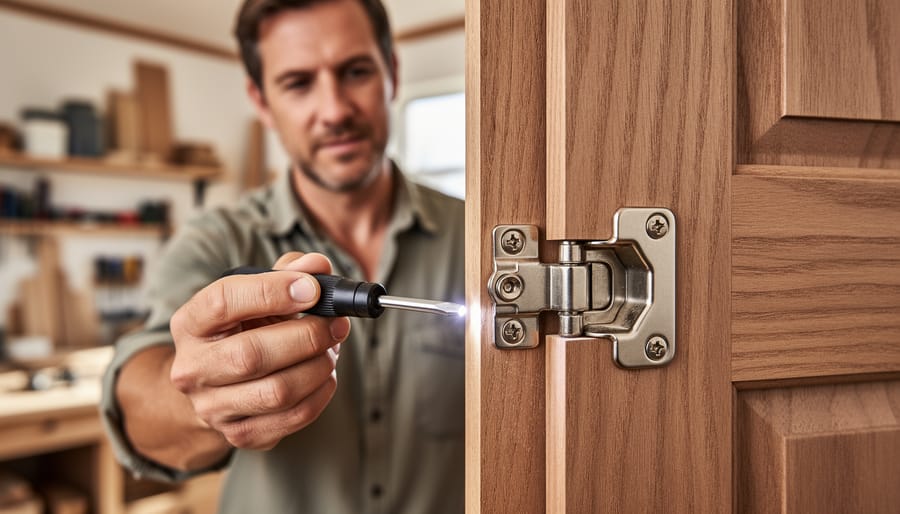
Remove the cabinet doors first, working methodically through hinges with a drill or screwdriver that fits precisely. As you lift each door free, notice its weight and balance, wine bar cabinets often feature leaded glass or thick panels that require careful handling. Place doors on padded blankets rather than leaning them against walls where they might topple.
- Photograph the cabinet from multiple angles before starting, capturing hinge placements and hardware orientation
- Number each door, drawer, and shelf with painter’s tape, creating a corresponding map for reassembly
- Remove glass shelves and panels, wrapping each piece individually in moving blankets
- Extract wine racks by unscrewing mounting brackets, keeping original hardware in labeled bags
- Detach all knobs, pulls, hinges, and decorative elements, storing matched sets together
For antique pieces, inspect screw heads before applying force, old brass screws strip easily, and replacement becomes complicated. If you encounter stuck screws in vintage hardware, apply penetrating oil and wait overnight rather than forcing them. Wine racks with dowel construction may slide out once support brackets release, but glued installations require gentle persuasion with a rubber mallet to avoid splitting joints. Create a dedicated workspace for removed components, keeping glass separate from metal hardware to prevent scratching during the refinishing process.
Step 2: Stripping the Old Finish
Apply your chosen stripper generously with a natural-bristle brush, working in manageable sections rather than coating the entire cabinet at once. I’ve found that maintaining a thick, even layer, about the consistency of pancake batter, prevents premature drying and ensures the chemicals penetrate deeply into old finishes. Most quality strippers need fifteen to thirty minutes to work, though aged shellac or multiple varnish layers may require longer.
Watch for the telltale wrinkling and bubbling that signals the finish is ready for removal. Use a plastic putty knife or scraper held at a shallow angle to lift away the softened finish, working with the grain to avoid gouging the wood beneath. For intricate carved details and tight corners where scrapers won’t reach, dental picks and natural-bristle toothbrushes excel at teasing out dissolved finish without damaging delicate woodwork.
Stubborn areas often need a second application. Rather than scrubbing aggressively, reapply stripper to resistant spots and give it additional dwell time, patience yields better results than force.
Soy-based and citrus strippers offer effective alternatives to traditional methylene chloride formulas, though they typically require longer working times and may need multiple applications on thick, aged finishes. They produce fewer fumes and pose less health risk, making them worth considering despite the slower pace.
Dispose of stripper residue according to local hazardous waste regulations. Never pour chemical strippers down drains, and seal used materials in metal containers before taking them to designated collection facilities. Proper disposal protects both your plumbing and the environment.
Step 3: Sanding and Surface Preparation
With the old finish stripped away, proper sanding transforms raw wood into a surface ready to accept stain beautifully. This stage demands patience, rushing through grits or over-sanding decorative elements can compromise the cabinet’s character.
Begin with 80-grit sandpaper to remove any remaining finish residue and level minor surface imperfections. Work with the grain in long, even strokes, applying consistent pressure. An orbital sander handles flat panels efficiently, but keep the tool moving to avoid creating depressions. Pay attention to edges and transitions where one surface meets another; these areas reveal careless work if left uneven.
Progress to 120-grit sandpaper, which refines the surface and eliminates scratches from the coarser grit. The wood should feel noticeably smoother under your palm. For carved details, corbels, or routed edges common in wine bar cabinetry, switch to hand-sanding with flexible pads or folded sandpaper. These elements define the piece’s elegance, preserving crisp lines matters more than speed.
Finish with 180-grit or 220-grit sandpaper for a silky texture that accepts stain evenly. Wipe all surfaces thoroughly with a tack cloth to remove sanding dust, which would otherwise create a gritty finish under topcoat. The wood should appear uniform in color and texture, with no glossy patches indicating missed spots. This meticulous preparation separates amateur results from refinishing that looks professionally executed.
Step 4: Staining or Painting
With your surface meticulously prepared, the staining or painting phase transforms the raw wood into a refined backdrop for your wine collection. I approach this stage methodically, applying thin coats rather than attempting full coverage in a single pass.
For staining, always work in the direction of the grain using a high-quality brush or lint-free cloth. Apply the stain generously, allowing it to penetrate for three to five minutes before wiping away excess with a clean cloth. The first coat reveals the wood’s character but typically appears lighter than expected. Don’t panic. Building color through multiple thin applications yields far more sophisticated results than one heavy coat, which risks blotching and obscures the grain pattern that makes hardwood cabinetry valuable.
Color selection deserves careful consideration. Rich walnut or mahogany tones create classic elegance that frames bottles beautifully, while lighter honey or amber stains suit contemporary spaces and prevent the cabinet from overwhelming smaller rooms. Consider how the finish will interact with your glassware and bottle labels under both natural and artificial light.
For a modern aesthetic, painting offers complete color control. Use a quality cabinet-grade paint in satin or semi-gloss finish. Apply with a fine foam roller for smooth surfaces and a brush for detailed areas, maintaining thin, even coats. Deeper hues like charcoal or navy create dramatic backdrops for wine displays, while crisp white provides gallery-like minimalism.
Allow each coat to dry completely before assessing whether additional layers are needed.
Step 5: Applying Protective Topcoat
The topcoat represents your cabinet’s final defense against the unique challenges wine storage presents. I’ve learned through refinishing several wine bar pieces that this protective layer must balance beauty with serious moisture resistance, particularly for cabinets housing bottles that sweat condensation or where the occasional spill is inevitable.
Apply your first coat thinly using a high-quality natural bristle brush or foam applicator, working with the grain in long, smooth strokes. For wine cabinets, I exclusively use water-based polyurethane or conversion varnish, both offer exceptional moisture protection without the yellowing tendencies of oil-based finishes that can distort your carefully chosen stain color. Allow each coat to cure fully, typically 4-6 hours for water-based products, though I prefer waiting overnight between applications.
Lightly sand with 320-grit paper between coats to ensure proper adhesion and eliminate any raised grain or dust nibs. Three coats minimum provides the durability these pieces require, especially on horizontal surfaces where bottles rest and condensation pools. For sheen, I favor satin or semi-gloss finishes, they’re practical for cabinets displaying bottles where you find quality wine providing subtle elegance without the fingerprint-attracting gloss or the maintenance demands of matte finishes.
Refinishing Glass Components and Hardware
Glass components and hardware serve as the jewelry of your wine bar cabinet, they catch the light, frame your collection, and provide the tactile experience of opening and closing doors. While the wood receives most of the attention during refinishing, these elements deserve equal care to achieve a cohesive, polished result that befits the cabinet’s renewed elegance.
Begin with the glass panels, which may have accumulated years of residue, cloudiness, or minor scratches. Remove each piece completely and lay it flat on a padded surface. For basic cleaning, use a solution of equal parts white vinegar and distilled water with a microfiber cloth, working in circular motions to lift grime without streaking. Stubborn deposits from wine vapor or hard water respond well to a paste of baking soda and water applied gently with a soft cloth. If you encounter light scratches on glass shelving, specialized glass polishing compounds containing cerium oxide can reduce their visibility, though this requires patience and consistent pressure with a buffing pad. For deeply etched or cracked glass, replacement becomes the wiser choice, modern glass suppliers can cut custom pieces to your specifications, and the investment preserves both safety and visual clarity.
Hardware restoration begins with assessment. Remove all hinges, handles, knobs, and decorative elements, placing them in labeled bags that correspond to their original positions. Brass and bronze hardware develops a patina that some collectors prize, while others prefer the bright gleam of freshly polished metal. For polishing, brass cleaners formulated without harsh abrasives work effectively, apply with a soft cloth, let sit briefly, then buff to your desired sheen. Ornate hardware with recessed details benefits from a soft brass brush to reach crevices. If you’re updating rather than restoring, select new hardware that echoes the cabinet’s era and your refinished wood tone. Brushed nickel or oil-rubbed bronze complements darker stains, while polished brass or champagne finishes pair beautifully with lighter, more contemporary treatments. Test the new hardware’s scale against your cabinet doors before final installation, oversized pulls can overwhelm delicate proportions, while undersized knobs disappear against substantial panels.
Reassembly and Final Quality Verification
With your cabinet fully cured, reassembly becomes the moment where weeks of meticulous work either culminate in satisfaction or reveal overlooked details. I’ve learned that rushing this stage undermines everything that came before, take your time, work methodically, and verify each component as you go.
Begin by reattaching shelf supports and any internal wine rack hardware, checking that screw holes haven’t been compromised by stripping or sanding. Install glass shelves carefully, ensuring they rest securely on their supports without wobbling. When rehinging doors, start with the top hinge to establish proper alignment, then work downward, adjusting as needed to achieve even gaps around all edges. A misaligned door on a wine cabinet isn’t merely aesthetic, it can affect the seal and compromise the controlled environment your collection requires.
Hardware installation demands precision. Thread drawer pulls and door handles finger-tight first, step back to verify visual alignment across all pieces, then tighten fully. I once rushed this on a client’s cabinet and ended up with pulls that looked crooked despite being technically straight, the human eye notices these inconsistencies immediately.
Before declaring the project complete, conduct a thorough quality verification:
- Finish appears even and free of dust, drips, or missed spots under raking light
- All doors open smoothly and close with consistent gaps on all sides
- Drawers glide without binding and sit flush when closed
- Hardware operates smoothly with no loose screws or misaligned handles
- Glass panels are secure, clean, and free of fingerprints or installation marks
- No chemical odor remains that could affect wine storage
Run your hand across all surfaces to catch any roughness your eyes might miss, and test each moving part under actual use conditions, open doors while holding a wine bottle to simulate real-world function.
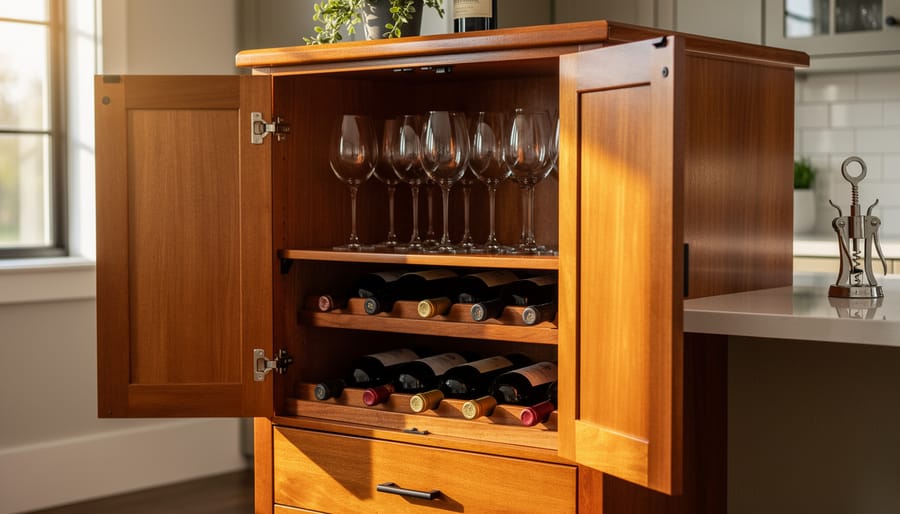
Curing, Care, and Long-Term Maintenance
After completing the final topcoat, resist the temptation to immediately restock your wine collection. A properly cured finish is crucial for both durability and protection against the moisture and handling your cabinet will endure.
Most water-based polyurethanes require 24 to 48 hours before light handling, but full cure takes two to three weeks. Oil-based finishes need longer, at least 72 hours before gentle use, with full hardness developing over 30 days. During this period, avoid placing bottles or glassware in the cabinet, and keep doors open to promote air circulation. The finish continues cross-linking at the molecular level, building the chemical resistance that protects against wine drips and condensation.
Once cured, maintain your refinished cabinet with gentle care. Dust weekly with a microfiber cloth, always following the wood grain. For cleaning, use a slightly damp cloth with plain water or a pH-neutral wood cleaner, avoid ammonia-based products, which can cloud the finish over time. Wipe up wine spills immediately; even with a protective topcoat, prolonged exposure to acidic wine can dull the sheen.
Place felt pads under wine bottles if storing them horizontally on bare wood shelves to prevent finish abrasion. During Toronto’s humid summers, check that your cabinet isn’t developing condensation from temperature differentials, which can compromise even the best finish. In dry winter months, a room humidifier prevents the wood from contracting and stressing the finish.
Every six months, I apply a thin coat of quality furniture wax to high-touch areas like door fronts and handles. This adds an extra protective layer and restores subtle depth to the finish, keeping your wine bar cabinet looking as refined as the bottles it houses.
Common Challenges and Expert Solutions
Even with careful preparation, refinishing a wine bar cabinet presents challenges that can test your patience and skill. Understanding these common issues and their solutions will help you achieve professional results without costly mistakes.
Blotchy staining remains the most frustrating problem I have encountered, particularly on woods like cherry or maple. The issue stems from uneven grain density that absorbs stain at different rates. The solution is prevention: apply a wood conditioner before staining, allowing it to even out absorption across the surface. If blotching has already occurred, you will need to strip the stain and start fresh with proper conditioning. I learned this the hard way on a maple wine cabinet where I skipped conditioning in a rush.
Finish bubbles typically result from trapped air, dust particles, or application in high humidity. Sand down the affected area with 320-grit paper, clean thoroughly with a tack cloth, and reapply your topcoat in a dust-free environment with moderate humidity. Thin coats applied with proper brush technique prevent most bubbling issues.
Grain raising creates a rough surface after applying water-based products. The moisture causes wood fibers to stand up, compromising smoothness. Prevent this by deliberately raising the grain before staining: dampen the bare wood with distilled water, let it dry completely, then sand with 220-grit paper. This pre-raises and removes loose fibers before finishing begins.
Color inconsistencies often appear when refinishing wine cabinets with mixed wood species or veneer panels. Test your stain on hidden areas first, and consider using gel stains which sit on the surface rather than penetrating deeply, providing more uniform color across different woods. Multiple thin coats build depth more predictably than single heavy applications.
Can I fix a sticky finish that would not dry properly?
Remove the tacky finish completely with mineral spirits or the appropriate solvent, ensure the workspace temperature is above 65°F with good air circulation, and reapply thinner coats. Sticky finishes usually result from cold conditions, high humidity, or applying coats too thickly.
When should I abandon DIY refinishing and hire a professional?
Seek professional help if you encounter extensive veneer damage, structural repairs beyond your skill level, or if the cabinet has significant antique value where mistakes could diminish worth. Complex inlay work and museum-quality pieces also warrant expert intervention.
How do I salvage a project where the stain color turned out wrong?
If the stain is too dark, try wiping with mineral spirits immediately after application to lighten it. For dried stain that is the wrong tone, strip and restart or apply a glaze or toner to adjust the color before sealing.
The key to overcoming refinishing challenges lies in patience and willingness to correct mistakes early. A wine bar cabinet deserves the extra effort to get details right, as these pieces serve as focal points in entertaining spaces where imperfections become obvious. When I refinished my own cabinet, I stripped and restained one door three times before achieving the consistent color I wanted, but that persistence paid off in a piece I am proud to display.
Refinishing your wine bar cabinet represents an investment in both sustainability and sophistication. Rather than discarding a piece that has served your collection well, restoration breathes new life into furniture that often holds both functional and sentimental value. The process we’ve explored transforms worn surfaces into renewed elegance while preserving the specialized features that make wine storage furniture distinct from ordinary cabinetry.
Beyond the considerable cost savings compared to replacement, a thoughtfully refinished cabinet elevates your entertaining space. The gleaming wood, protective finish, and restored hardware create a focal point that showcases your wine collection with the reverence it deserves. Each time you select a bottle for guests, the cabinet itself becomes part of the experience, a testament to your appreciation for craftsmanship and attention to detail.
The skills you’ve developed through this project extend beyond a single piece of furniture. Understanding wood behavior, finish characteristics, and restoration techniques equips you to maintain the sophisticated aesthetic throughout your home. Your refinished wine bar cabinet now stands ready to serve its dual purpose: protecting your collection while enhancing the atmosphere of every gathering, from intimate dinners to celebratory evenings.